How Quartz Countertops Are Fabricated for Your Home
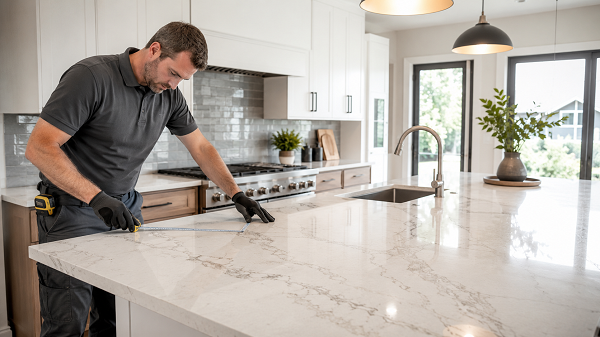
When I look at a finished quartz countertop, I see more than a smooth and attractive surface. I also see careful planning, exact measurements, skilled cutting, edge work, polishing, and safe installation. Although the finished counter may look simple, many important steps happen before it reaches the kitchen or bathroom.
The process begins long before the slab is cut. First, I consider the room layout, cabinet size, sink position, appliance openings, and preferred edge style. Then, the fabricator creates an accurate template so every section fits the space correctly.
In addition, the quartz pattern must be planned with care. Veins, colors, and seams should flow naturally across the surface. Therefore, good fabrication combines technical skill with thoughtful design.
When each step is completed correctly, the final countertop feels like it was made for the room. It fits closely against the walls, supports daily tasks, and adds a clean, finished look to the home.
Quartz Fabrication Starts With a Clear Plan
When I help plan custom quartz fabrication in Milwaukee, I first think about how the homeowner uses the room. For example, a family may need a wide island for meals, homework, and food preparation. Meanwhile, someone who cooks often may need more open counter space near the sink and stove. Therefore, the fabrication plan should support daily activities as well as the room’s style.
I also look at the cabinets, appliances, sink, flooring, and wall shape. These details matter because the countertop must fit each area closely. In addition, the quartz color and pattern should work well with the rest of the room. As a result, good fabrication begins with design choices rather than cutting equipment.
Key Takeaways
- Accurate measurements help quartz countertops fit correctly.
- Professional fabrication includes cutting, edge shaping, polishing, and opening preparation.
- Careful installation protects the cabinets, seams, sink, and finished quartz surface.
Understanding What Quartz Countertops Are Made From
Quartz countertops are engineered surfaces. Manufacturers combine natural quartz particles with binding materials and color pigments. Then, they form the mixture into large, solid slabs.
Because manufacturers control the process, quartz slabs often have a more consistent color and pattern than natural stone. However, some designs still include bold veins, soft movement, or stone-like details. Therefore, homeowners can choose from simple solid colors as well as patterns that look similar to marble.
Quartz also has a nonporous surface. As a result, it does not absorb spills as easily as many natural stone products. This feature makes it a practical choice for kitchens, bathrooms, laundry rooms, and other active areas.
However, a quartz slab does not arrive ready to place on cabinets. Fabricators must measure, cut, shape, polish, and prepare it for the exact room. Therefore, the quality of the fabrication work affects both the appearance and the performance of the finished countertop.
The First Home Visit and Project Discussion
Before anyone cuts the quartz, I like to review the full project with the homeowner. First, I ask which areas need new countertops. Then, I ask about the sink, faucet, cooktop, backsplash, and preferred edge style.
This discussion helps prevent delays later. For example, the fabricator needs the exact sink model to prepare the correct opening. Likewise, a cooktop opening must match the appliance measurements. Therefore, homeowners should choose these items early whenever possible.
I also discuss countertop height, island size, seating space, and overhangs. A standard counter and a large breakfast bar do not need the same support. As a result, I check the cabinet strength and support plan before the project moves forward.
The project discussion also gives me a chance to review the budget. Different quartz designs, slab sizes, edge details, and layout needs can affect the total cost. Therefore, a clear plan helps the homeowner understand what the quote includes.
Choosing the Right Quartz Slab
Quartz comes in many colors and patterns. Therefore, choosing the right slab can feel difficult without a clear approach. I usually begin with the cabinets because they cover a large part of the room.
White or light cabinets can work with many quartz colors. For example, dark quartz can create strong contrast, while light quartz can make the room feel open and calm. Meanwhile, warm wood cabinets often look good with cream, beige, brown, or softly veined quartz.
I also look at the flooring. If the floor has a bold grain or busy pattern, I may suggest a quieter countertop. However, if the flooring has a simple appearance, the room may support a quartz slab with stronger veins or movement.
Lighting matters as well. A quartz sample may look one way under bright showroom lights and another way inside the home. Therefore, I suggest viewing samples near the cabinets and under the room’s normal lighting.
Many homes in Milwaukee include older layouts, newer open kitchens, and a wide mix of cabinet styles. Because of this variety, I do not recommend one quartz design for every property. Instead, I choose a slab that supports the home’s existing character and the owner’s preferred look.
Measuring the Cabinets and Walls
Precise measurement is one of the most important parts of countertop fabrication. Even a small mistake can affect seams, wall gaps, sink placement, or appliance clearance. Therefore, professional fabricators create an exact template of the countertop area.
Before templating begins, the base cabinets should sit in their final positions. They must also remain level and firmly attached. Otherwise, later cabinet movement may affect the countertop fit.
During the measurement process, the fabricator records:
- Cabinet lengths and depths
- Wall angles and uneven areas
- Sink and faucet locations
- Cooktop or range openings
- Countertop overhangs
- Island dimensions
- Backsplash needs
- Seam locations
- Support requirements
Walls are not always perfectly straight. Likewise, corners may not form exact right angles. Therefore, the template must follow the real shape of the room instead of relying only on standard measurements.
Planning the Quartz Layout
After measurements are complete, the fabricator plans how each countertop section will fit on the slab. This step is sometimes called slab layout.
First, the fabricator reviews the slab pattern. Then, the team decides which parts of the slab should appear on the island, sink area, and other visible sections. This planning becomes especially important when the quartz has large veins.
For instance, a strong vein may look better when it runs across the island rather than stopping at an awkward angle. In addition, nearby countertop sections should look connected whenever possible. Therefore, the fabricator may rotate or reposition templates to create better pattern flow.
The slab layout also helps control waste. However, saving material should not damage the final design. I prefer a layout that balances material use, visual flow, and strong seam placement.
Cutting the Quartz Slab
Once the layout receives approval, cutting begins. Fabricators use specialised cutting equipment to follow the template dimensions. Because quartz slabs are heavy and hard, the cutting process requires proper machines and trained workers.
The team cuts the main countertop shapes first. Then, they prepare openings for sinks, cooktops, faucets, and other fixtures. Each cut must follow the project plan closely.
Water often helps control dust and heat during cutting. In addition, the fabrication shop should use proper dust-control practices and safety equipment. These steps protect workers and help maintain a cleaner work area.
Although machines make accurate cuts, workers still play a major role. They inspect the slab, watch the pattern, check measurements, and examine each finished section. Therefore, skill remains important even in a well-equipped fabrication shop.
Creating Sink and Cooktop Openings
Sink openings require careful planning because the sink style changes the cut. For example, an undermount sink sits beneath the quartz. As a result, the exposed opening needs a clean and polished edge.
A drop-in sink rests on top of the counter. Therefore, its rim covers the edge of the opening. Even so, the cut must match the sink size and leave enough support around the area.
The fabricator also needs to know where the faucet, soap dispenser, filtered-water tap, or air switch will sit. These holes should have enough space between them. In addition, the faucet must clear nearby windows, backsplashes, and shelves.
Cooktop openings also need exact dimensions. A loose opening may fail to support the appliance correctly. However, an opening that is too small may prevent installation. Therefore, the fabricator follows the appliance details closely.
Shaping the Countertop Edges
After the main cuts, the fabricator shapes the exposed countertop edges. The edge profile affects the appearance, comfort, cleaning needs, and cost of the project.
Eased Edge
An eased edge has a clean, simple shape with slightly softened corners. Because it works with many kitchen styles, I often recommend it for modern and transitional rooms.
Beveled Edge
A beveled edge includes an angled cut along the upper part of the countertop. Therefore, it adds a visible design detail without becoming too decorative.
Bullnose Edge
A bullnose edge has a rounded shape. As a result, it feels softer and removes sharp outer corners. This option may work well in family kitchens.
Decorative Edge
More detailed profiles can support traditional cabinets and formal rooms. However, decorative edges usually require more fabrication work. Therefore, homeowners should review the added cost before choosing one.
I also think about cleaning. Simple edges have fewer grooves, so they are often easier to wipe. Meanwhile, detailed edges may collect dust or crumbs in smaller areas.
Polishing and Inspecting the Finished Pieces
After edge shaping, the team polishes each exposed section. This work gives the edge a smooth finish that matches the slab surface.
The fabricator also checks the sink opening, faucet holes, corners, seams, and overall dimensions. If an area feels rough or uneven, the team can correct it before delivery.
During inspection, I expect the fabricator to look for:
- Smooth and even edges
- Correct measurements
- Clean fixture openings
- Proper seam preparation
- Safe corner shapes
- Consistent polishing
- Chips or surface damage
This final shop inspection matters because repairs can become harder after the countertop reaches the home. Therefore, careful checking saves time during installation.
Preparing Your Home for Installation
Before installation day, the old countertops may need removal. In addition, plumbing and certain appliances may need disconnection. The project team should explain who handles each task.
The base cabinets must remain clear and easy to reach. Therefore, I suggest removing items from the top drawers and sink cabinet. This step gives installers space to work.
Homeowners should also create a clear path from the entrance to the kitchen. Quartz sections can be long and heavy. As a result, installers need enough room to move without hitting furniture, walls, or light fixtures.
Children and pets should stay away from the work area. This protects them and gives the installers a safer space for lifting and positioning the quartz.
Installing the Quartz Countertops
On installation day, the team first checks the cabinets and template details. Then, the installers carefully carry each quartz section into the room.
They place the pieces on the cabinets and check the wall fit, overhangs, appliance openings, and seam positions. If the room includes several countertop sections, the team joins them with a colour-matched seam material.
A strong seam should sit flat and receive support from the cabinet structure below. Although seams may remain slightly visible, skilled planning can make them less noticeable.
The installers also secure undermount sinks and check brackets for wide overhangs. A large island seating area may need hidden steel supports or decorative brackets. Therefore, support planning should happen before fabrication.
After placing the countertop, the team cleans the surface and inspects the finished work. However, plumbers or appliance specialists may still need to reconnect sinks, faucets, cooktops, or other fixtures.
Why Local Product Selection Matters
Visiting Quartz countertop suppliers in Milwaukee can help homeowners compare samples, view patterns, and discuss project details in person. In addition, a local showroom may make it easier to understand available colours, edge choices, lead times, and installation services.
Seeing larger samples can also reduce surprises. A small online picture may not show the full size, background tone, or vein pattern. Therefore, in-person comparison can make the final choice more confident.
Common Quartz Fabrication Mistakes to Avoid
One common mistake involves measuring before the cabinets reach their final positions. If installers move the cabinets later, the countertop may no longer fit correctly.
Another mistake involves choosing the sink too late. Without the exact sink details, the fabricator cannot prepare the opening accurately. Therefore, early fixture selection keeps the schedule moving.
Poor seam placement can also affect the final result. A seam may look more noticeable when it cuts through a strong vein or sits in an unsupported area. As a result, seam planning should happen during slab layout.
Some homeowners also forget about overhang support. Quartz is durable, but a wide unsupported area can face too much stress. Therefore, the cabinet maker and countertop team should agree on the support system.
Finally, comparing quotes only by price can cause confusion. One quote may include templating, sink cuts, delivery, and installation, while another may leave those items out. Therefore, I compare the full project details rather than the starting price alone.
Caring for Quartz After Installation
Quartz requires simple daily care. I usually clean it with mild soap, warm water, and a soft cloth. Because harsh chemicals may harm the surface finish, gentle cleaning products work better.
I also use cutting boards. Although quartz resists many scratches, direct cutting can damage knives and may leave marks over time.
Hot pans should not sit directly on the surface. Instead, I use trivets or heat pads. Sudden or intense heat can affect the binding materials in quartz.
Spills should be wiped up quickly, even though the surface does not absorb liquids easily. In addition, dried food can become harder to remove. Therefore, regular cleaning helps the countertop keep its fresh appearance.
Final Thoughts
Quartz countertop fabrication includes much more than cutting a slab. It begins with room planning, cabinet checks, material selection, and exact measurements. Then, skilled workers complete the slab layout, cutting, edge work, polishing, and fixture openings.
After that, careful installation brings every piece together. Therefore, each stage affects the fit, appearance, strength, and daily use of the finished surface.
When I plan the process carefully, the result feels like a natural part of the home. The countertop fits the room, supports daily tasks, and matches the homeowner’s preferred style. As a result, professional quartz fabrication creates a surface that can remain useful and attractive for many years.





Post Comment