Easy DIY: Fixing a Loose Kitchen Faucet in Just 3 Steps
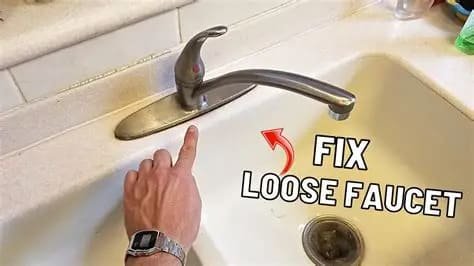
A loose kitchen faucet may seem like a small inconvenience, but if left unattended, it can quickly become a frustrating problem. A faucet that wobbles every time you turn it on not only makes daily tasks more difficult but can also lead to leaks, damage beneath the sink, and even costly plumbing repairs. Fortunately, tightening a loose faucet is one of the easiest DIY plumbing projects you can complete at home.
With just a few basic tools and about 20 to 30 minutes of your time, you can restore your faucet to a secure and stable position. This guide gstarboard walks you through the process in three simple steps, making it ideal even for beginners.
Why Does a Kitchen Faucet Become Loose?
Kitchen faucets experience constant use. Every time you move the handle, rotate the spout, or turn the water on and off, small amounts of pressure are applied to the mounting hardware beneath the sink. Over months or years, these repeated movements can gradually loosen the mounting nut or bracket that holds the faucet in place.
Other common causes include:
* Normal wear and tear
* Vibration from frequent use
* Improper installation
* Corrosion around the mounting hardware
* Loose mounting screws
The good news is that in most cases, tightening the hardware is all that’s needed to solve the problem.
Tools You’ll Need
Before getting started, gather the following tools:
* Adjustable wrench
* Basin wrench (recommended for tight spaces)
* Flashlight
* Clean cloth
* Work gloves
* Safety glasses (optional)
Having the proper tools ready will make the repair much easier, especially since the space beneath a kitchen sink is often cramped.
—
Step 1: Turn Off the Water and Inspect the Faucet
Safety always comes first.
Although tightening the faucet usually doesn’t require disconnecting water lines, it’s still a good idea to shut off both the hot and cold water supply valves beneath the sink. This prevents accidental leaks if you accidentally bump the plumbing connections while working.
Next, remove any cleaning supplies or storage items from the cabinet under the sink. Use a flashlight to locate the underside of the faucet.
Look for:
* Mounting nuts
* Mounting brackets
* Retaining screws
* Signs of corrosion
* Water stains or leaks
If you notice water leaking around the faucet base or damaged mounting hardware, additional repairs may be necessary before simply tightening the faucet.
—
Step 2: Tighten the Mounting Nut
This is the most important part of the repair.
Reach underneath the sink and locate the large mounting nut that secures the faucet to the countertop or sink deck.
Depending on your faucet model, you may need:
* An adjustable wrench
* A basin wrench for hard-to-reach locations
Turn the mounting nut clockwise until it feels snug.
Avoid over-tightening, as excessive force can:
* Crack certain sink materials
* Damage plastic mounting components
* Strip the threads on the mounting hardware
If your faucet uses mounting screws instead of a large nut, tighten each screw evenly to keep the faucet centered.
Once tightened, gently move the faucet from above to see if it still shifts.
If movement remains, check for an additional mounting bracket that may also require tightening.
—
Step 3: Test the Faucet
After tightening the hardware, restore the water supply by opening both shut-off valves.
Turn on the faucet and check:
* Water pressure
* Handle movement
* Faucet stability
* Any leaks beneath the sink
Rotate the faucet from side to side if it’s a swivel model.
It should now feel solid without wobbling.
Finally, wipe away any moisture and return the stored items to the cabinet.
Congratulations—you’ve completed a simple plumbing repair without calling a professional.
Tips to Prevent a Loose Faucet in the Future
Routine maintenance can help prevent the problem from returning.
Here are a few helpful practices:
Check Mounting Hardware Annually
Inspect the mounting nut every year and tighten it if necessary before it becomes noticeably loose.
Avoid Excessive Force
Many people unintentionally use the faucet as a handle while standing up or moving around the kitchen. This places unnecessary stress on the mounting hardware.
Fix Leaks Promptly
Water leaks can encourage corrosion, weakening metal brackets and mounting nuts over time.
Clean Under the Sink
Dust and moisture often accumulate beneath sinks. Keeping the area clean makes it easier to notice loose hardware before it becomes a larger issue.
When Tightening Isn’t Enough
Sometimes a loose faucet is a symptom of a larger problem.
You may need replacement parts or professional assistance if you notice:
* Cracked mounting brackets
* Broken retaining clips
* Rusted hardware
* Damaged countertops around the faucet opening
* Persistent movement after tightening
* Water leaking from supply lines
Older faucets that have been installed for many years may have worn components that cannot simply be tightened.
Benefits of Fixing a Loose Faucet Quickly
Ignoring a loose faucet can eventually lead to more expensive repairs.
Addressing the issue early offers several advantages:
* Prevents water damage beneath the sink
* Reduces wear on plumbing connections
* Improves kitchen safety
* Extends faucet lifespan
* Eliminates annoying movement during daily use
* Saves money on plumbing service calls
A simple tightening today can prevent major repairs tomorrow.
Common DIY Mistakes to Avoid
While this project is beginner-friendly, avoid these common errors:
* Forgetting to turn off the water supply
* Over-tightening the mounting nut
* Using the wrong size wrench
* Ignoring signs of corrosion
* Failing to inspect for hidden leaks
* Tightening only one side of a multi-point mounting system
Taking your time ensures a successful repair without damaging your plumbing.
Final Thoughts
Learning how to fix a loose kitchen faucet is one of the most valuable DIY home maintenance skills. The repair requires only a few basic tools, minimal plumbing knowledge, and less than half an hour of work.
By following these three simple steps—turning off the water and inspecting the faucet, tightening the mounting hardware, and testing the faucet afterward—you can restore stability and prevent future damage. Regular inspections and gentle everyday use will also help keep your kitchen faucet secure for years to come.
Instead of living with a wobbling faucet or paying for an unnecessary service call, tackle this easy DIY project yourself and enjoy a more reliable, functional kitchen.






Post Comment